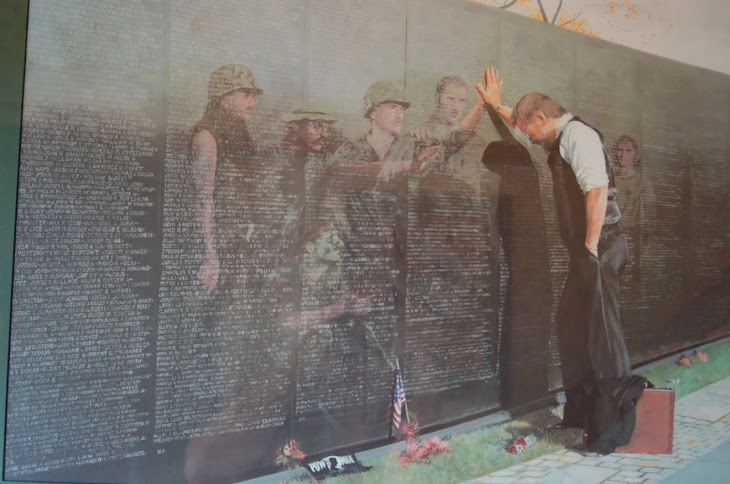
We "All gave Some...But some gave All"

We "All gave Some...But some gave All"
Honoring All Vietnam Veterans: Psalm 144:1 Blessed be the Lord my rock, Who trains my hands to war, And my fingers for battle---

Ephesians 6:10 (NKJV)

" Finally, my brethren, be strong in the Lord and the power of His might."


16 February, 2010


The Block Diagram is taken from the Flex Radio Opeating Manual 2007. The diagram shows the Personal Computer, interface cables, 1000D transceiver, to include additional accessories which can be added to the Flex Radio System.

The Diagram gives you a good overall view and understanding of the interconnections required. Note that the standard input and outputs on the Personal Computer are used, this makes interfacing the outputs from the 1000D compatible with the inputs of the PC. This holds true for the outputs on the PC being compatible with the inputs on the 1000D.

The Diagram also shows that there are alternate sources for audio output, one output on the PC, the other on the 1000D. The second source is a polled keyer paddle input, one on the PC, the other on the 1000D. This added some flexability when determining a location for 1000D hradward housing.


29 January, 2010

Power SDR Test & Measurement Area


I am very fortunate to have a special area with in the "shack" which is separate from the HF operating console, as well as the test bench area. This small area, is were I am able to setup and do some software testing and hardware interfacing and not tie up the test bench, or the operating console. However, the area in the photo is just behind my HF console and close enough to the test bench if needed!


As you can see, I use a three level oversize rack to do the hardware setup. The top shelf holds the 19" Envision monitor. The monitor has dual video (AVG, DMI) inputs. On either side of the monitor are the two stereo Inland, Pro sound 2000 series multi media amplified speaker system. The speakers are connected to the output of the PC which is fed by the Delta 44 audio interface from the 1000D. These speakers work very nicely, as they are small and produce a very good quality audio for initial setup and testing. In addition, to the right of the monitor is a standard PC wired mouse, as well as the Griffin knob. The Griffin knob allows the operator to tune the transceiver, as if it were a hardware tuning dial, as opposed to using the mouse to tune the transceiver.


The second shelf (center) holds the "hardware box" 1000D, which is not visible because of the keyboard drawer being extended. I have placed the 1000D out of the way, as there is no need to have it visible, as there are no controls on it, except the power switch. The Delta 44 audio interface is also at the rear of the shelf and out of the way. To the far right is the desktop Acer AXT mid tower. The configuration of the tower is as follows: (1)Processor-Athlon AMD 64- 3800(+) 2.4Ghz, with 2GB of Ram, running Windows XP Pro version 2002 and service pack 2. (2)Dual DVD drives. (3)Hard Drives- dual 250GB drives, primary drive running windows operating system, second drive running Linux operating system. (4)Audio card- M-Audio Delta 44 with external interface. (5)Video Card- dual channel video output with standard VGA and DMI outputs. (6)Dash Board- front panel, with several USB, and firewire ports. (7)Power Supply- 350Watt standard.

The third shelf (lower) provides space for the power supplies. The primary supply for the system is an Ashtron 35 Amp linear supply with metered outputs. The secondary supply used for other items not associated with the flex system, is a Pyramid Phase III Model PS-25, also with meters for voltage and current.

26 January, 2010

SDR 1000D Audio Interface to PC


Here is a closer look at the M-Audio interface or breakout box shown in the photo from the last post. M-Audio refers to this breakout box as their Delta series, which is this particular model.

As you can see there are 4 inputs and 4 outputs to the interface. Inputs 1 & 2 are line inputs. Inputs 3 & 4 are microphone inputs.

The outputs 1 & 2 are used to drive a pair of amplified speaker, as would be used for audio from your PC. Outputs 3 & 4 are the line outputs, which I referenced from the last post.
Flex-Radio use M-Audio as one of several "approved" audio interfaces along with an audio card which is installed in the PC. This particular M-Audio interface came with the 1000D when I purchased it, as both the Flex 1000D, and the accessory item were all pre-owned.
The audio interface does not come with any of the old or newer Flex systems, they must be purchased separately, along with the other items required for a complete operating system.

I currently use the speaker outputs to feed a pair of amplified Inland Pro Sound 2000 mulit-media speaker systems. They are moderately priced and have a very good sound quality for HF AM and SSB operation.

On the back side of the interface is the PC type "D" connector which connects to the rear panel of the PC.

SDR 1000D Rear Panel Connections


Here is a rear view of my 1000D on the upper shelf, showing the minimum primary connections required to get the system up and running.

On the far left, you can see the power input cable from the Astron 35 amp power supply, which is located on the lower shelf. The 1000D requires 13.8Vdc @25amps The Astron RS-35M is a linear type power supply, as I am not a BIG fan of switching supplies! (Note: I use a 35 amp power supply, as my 1000D has a 100 watt linear amplifier built into it. 1 watt is the normal output power without the linear amp.)

Next to and just below, to the right is the antenna input connector, BNC type. I'm feeding a 1/2 wave 160 meter inverted "V" cut to my operating frequency of 1885khz with RG58X.

On the right side of the panel there three black cables which come from the Delta 44 audio interface, they are; line input- to the sound card(Blue color-coded), line output -to speaker output on the sound card(Green color-coded), and external speaker- to amplified speakers or (high impedance) headset. You will be able to see a better photo of the Delta 44 interface in the next post.

The gray cable below the black audio cables is a standard parallel port connector. A standard parallel cable is used for this interface with no problem!

Ok, that is pretty much it as far as the rear panel cables and interface is required to get things running. Of course you will need a microphone, and or key, paddles or a bug depending on the operation mode you choose. I will cover that in a later post.


25 January, 2010

SDR 1000D Operational Overview

The RECEIVER- is an advanced direct conversion design using direct digital synthesis. It converts RF directly to audio. Separate in-phase and quadrature signals are then fed to a computer sound card for digital signal processing using an innovative in-phase and quadrature (I and Q) image-reject approach. These connectors are provided on the rear panel.

The TRANSMITTER-of the SDR-1000D hardware is designed to take processed audio from the sound card and convert it to RF. The transmit conversion includes boosting the RF to 100Watt on 160 meters through 10 meters.

The true "heart" of the SDR 1000D is NOT inside the black box! Data is the "lifeblood" of this radio; the hardware is just a portal between the analog and digital worlds.

The SDR 1000D software -know as PowerSDR-determines how a received signal will be demodulated. It also creates the transmitted signal according to the mode you wish to operate. Therefore this gives the SDR, the most literal sense of the term; Software Defined Radio !

This SDR system is NOT to be confused with a microprocessor controlled radio that offers updateable firmware. The changes implemented by firmware updates are limited in scope because the inflexible hardware defines and constrains what can be done with the radio. Not so in the SDR-1000D software. In fact the software, is the radio to the greatest extent possible. Very large changes can be made when you modify the software, of an Software defined radio.

Inside The SDR 1000D (Photo #2)

Here is a second view of the SDR 1000D with the top cover removed. At this point I will reveiw the different PCB with in the 1000D, their location and also their function and operation of each PCB.


As the boards are horizontally mounted with the largest of the boards on the bottom . The bottom board is the interface PCB which provides the connections between all the other boards in the system and some of the "outside world" connections.


Some of the major connections to this PCB are; earth ground, X2 External Control Connector, Parallel Port Connector, as well as and external customer provided frequency standard input connector. These connections are visable on the Photo showing the rear panel of the SDR 1000D.


The interface card is a bit difficult to see because of it's location in the horizontal stack and at the very bottom!


24 January, 2010

The SDR 1000D From The Inside !

Ok, now that we have had a chance to look over the exterior of the SDR 1000D, let's remove the top cover, look "under the hood" and see what makes it "tick."
As you can see the printed circuit boards, (PCB's) are mounted in a horizontal, "sandwich" style configuration, with the largest of the PCBs mounted on the bottom of the unit, and the smaller PCBs mounted one on top of the other.
With the fan being mounted on the front panel, air is circulated through and across each of the
PCBs from front to back. In the last two years that I have used the 1000D, I have had no problems related to heat. As a side note, I have noticed the Flex Radio has done the same thing, using the horizontal mounting approach on their 1500, 3000 and 5000 series Flex Radios.
Most of the internal wiring is well dressed, either between the PCBs, along the sides, and bottom of the unit, making it easy to get around inside if needed. The only major wiring which is run above the boards, is the power supply cables, that runs from the right side rear connector to the input of the power supply board as shown in the photo.
I will cover the function of each individual printed circuit board used within the SDR 1000D, and their operation and location of each board in the next post.
,